The wisdom of administering an all-embracing, company-wide quality control regime and investing in the most suitable visual inspection equipment can be illustrated by the low reject levels and the excellent reputations enjoyed by businesses who pursue such laudable policies.
Rather than regarding time and money spent on engaging in best-practise quality control methods and using first-class visual inspection equipment as negative expenditure, more astute organisations realise that the avoidance of rework situations and the preservation of their hard-won reputations, delivers a rapid return on investments made in the pursuance of excellence.
One such farsighted, quality conscious company is Southend-on-Sea, Essex based Rega Research Ltd. Rega Research enjoys a global reputation for the exceptional quality of its famous high-fidelity sound system products. So confident is Rega in the quality and longevity of its products, the company provide a lifetime warranty against manufacturing defects across its entire range.
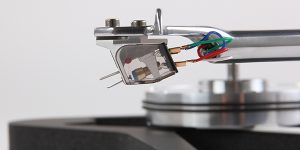 To ensure the premium quality of Rega’s components and assemblies and to guarantee their prolonged superior performance, they are meticulously inspected and tested at each stage of manufacture. Given the sheer volume of in-depth inspection tasks undertaken at Rega’s 30,000 sq ft design and manufacturing facility, the company make use of a wide range of advanced optical measurement and visual inspection aids from Vision Engineering.
The value of Rega’s use of Vision Engineering products can be illustrated by the advantages delivered by a Swift PRO Cam soon after its purchase. By sheer coincidence, the day after the advanced video measuring system was installed, a batch of very expensive cantilever assemblies arrived from a supplier. The company’s Swift PRO Cam’s first task was to verify the accuracy of the critical components. The superior precision levels provided by the Swift PRO Cam enabled a minute inaccuracy to be detected in the extremely tight toleranced parts. Without the intervention of the company’s new system, the parts would have been fitted into a high number of expensive, labour intensive moving coil cartridges.
“The Swift PRO Cam paid for itself within 24 hours” 
Simon Webster of Rega Research explained. “Even though the inaccurate parts would have been picked-up after being fitted to our turntable arms, had we not invested in the Swift PRO Cam, the time-consuming, complicated task of removing and replacing the faulty components in a high number of cartridge assemblies would have proven to be extremely costly and would have significantly delayed our production schedule.
“As the precision of the Swift PRO Cam allowed our staff to quickly identify the inaccuracy in the components prior to assembly, we were able to avoid using them and a new batch of components were quickly airfreighted to us. In-fact, by identifying the faulty batch and helping us to avoid the many man hours involved in rectifying the problem, the Swift PRO Cam paid for itself within 24 hours of being put into use.”
With simplicity at its core, Vision Engineering’s Swift PRO Cam is an advanced 2 / 3-axis high-accuracy video measuring system. Ideal for use by both novices and advanced users alike, the Swift PRO Cam simplifies work steps and reduces operator error whilst minimising training requirements. An array of smart video edge detection tools further helps to ensure the accuracy and repeatability of results regardless of operator skill levels.
Having reaped the benefits of using the Swift PRO Cam, the need for a measuring system with a larger capacity and additional functions prompted Rega’s recent purchase of Vision Engineering’s innovative Hawk Duo Video Measuring Microscope.
The Hawk Duo enables the high-accuracy, repeatable measurement of complex components of all materials and excels at measuring both routine and difficult-to-view components, such as black or transparent plastics.
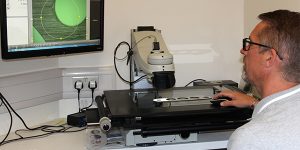 An invaluable addition to manufacturing and inspection functions
To ensure optimum accuracy, each Hawk Duo measuring stage features factory-set, non-linear error correction (NLEC) calibration, which is traceable to NPL/NAMAS/NIST standards for the purposes of ISO9000. Combined with 0.5µm resolution measuring encoders, NLEC helps to deliver a system repeatability of up to 2µm and provides complete confidence in achieved results.
Vision Engineering’s flexible Hawk Duo uses next generation ‘touch-to-measure’ software, meaning that, in addition to conventional mouse control, operators are able to ‘pinch’ to zoom, ‘swipe’ to pan across an image and ‘touch’ to take a measurement. In addition, users can even trace their finger around an on-screen shape to ‘see’ a particular feature.
Icon-based control provides operators with smartphone familiarity, whilst a Windows operating system enables simple integration with users’ applications, such as Microsoft Excel, or connection with network printers and other devices.
Simon Webster continued, “As our Hawk Duo uses multi-touch measurement software, with ‘touch-to-measure’ technology, it has proven to be very intuitive and quick and easy to use. Therefore, soon after its installation, our operators were able to make full use of all of the Hawk’s functions and to perform rapid, accurate inspection routines. Given the diverse nature of our components and their wide range of sizes, the innovative Hawk Duo system has proven an invaluable addition to our manufacturing and inspection functions.
An essential tool for intricate tasks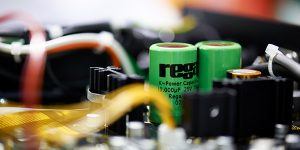
“In addition to the Swift PRO Cam and Hawk Duo systems, our staff use a wide range of Vision Engineering’s products for a variety of tasks across our entire facility. As the company’s range is so wide, we are always able to source a specific Vision Engineering product that is most appropriate for each of our measuring and inspection applications. For instance, a common use for our various Vision Engineering stereo microscopes is the inspection of our PCBs (printed circuit boards).
“To enable boards to hold more elements, PCB components are becoming ever smaller and increasingly more difficult to inspect. Therefore, our Vision Engineering stereo microscopes have become an essential tool for the intricate tasks involved in the production and visual inspection of Rega’s PCBs.
“Because many of our staff are involved in manufacturing, carefully manipulating and inspecting a wide range of minute parts under high-magnification, we are conscious of the possibilities of eye strain and operator fatigue, we are also aware of the resulting errors that may occur. In addition to the need for utmost precision, it was these factors that first attracted us to the Vision Engineering range. The outstanding image quality and excellent ergonomics of Vision Engineering systems are invaluable in helping us to maintain our productivity levels and in ensuring the continued quality of our output. In addition, they are beneficial in safeguarding the welfare of our staff.”
Headquartered in Send, Surrey, Vision Engineering have been involved in the design and manufacture of world leading Stereo Microscopes for over 60 years. Engineers and scientists worldwide use the company’s high-quality systems for a wide range of inspection and measurement applications across a wide range of industries. Renowned for pioneering optical design, Vision Engineering’s microscope and metrology systems perform to the highest standards.
