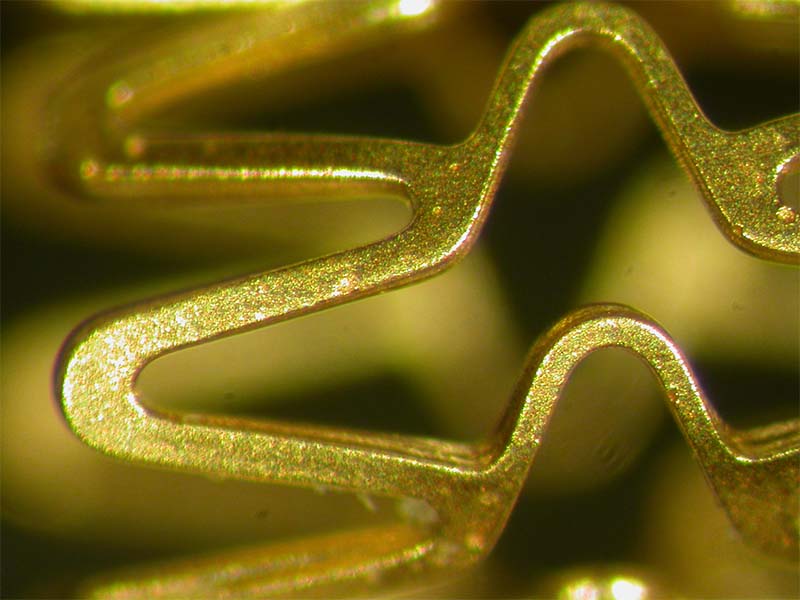
Coronary stent inspection: Reviewing the dimensional and visual inspection of bare metal coronary stents
Manufacturers of implantable medical devices invest a large amount of time and money developing safe and effective products that meet a plethora of regulatory restrictions and guidelines. These regulations apply equally to the common coronary stent as they do to experimental devices.
Throughout the development process, manufacturers are dedicated to producing a biocompatible product that meets the strict regulatory requirements and delivers a product of exceptional quality. Providing surgeons with absolute confidence in their product.
This dedication to exceptional quality continues once the device is approved for manufacture. Detailed quality control procedures are put in place to ensure only compliant; defect free devices are sent out to hospitals.
In this application note, we review the inspection requirements of a quality control procedure for bare metal stents (BMS). Specifically those manufactured using cobalt-chromium.
This is based on processes developed by a number of our customers.
Stent dimensions fall within the scope below:
Length: 6 – 32mm
Diameter: 2.0 – 4.5mm
Thickness: 0.08mm – 0.11mm

The importance of quality control
Quality control of coronary stents call for 100% inspection in order to avoid a number of potential health risks to the patient.
Dimensional or material defects in a stent could lead to stent migration, causing a reoccurrence of the blockage to the artery. A defect may also cause stent resinosis where the artery narrows again after the stent has been implanted.
As the stent comes into direct contact with the artery wall, it is critical that the surface finish is perfect. During the deployment of the stent, even the slightest surface defect may lead to mechanical damage to the artery. This causes localised inflammation and may even lead to stent thrombosis, where a blood clot forms on the stent.
Coronary stent inspection criteria
Inspection of coronary stents can include mechanical testing and radiographic, dimensional and visual inspection.
The procedures reviewed in this application note cover:
1. Dimensional inspection:
This step involves measuring the stent to ensure that it matches the design specifications. Throughout this stage detailed reports will be created to demonstrate that all quality control processes have been followed and to provide traceability should the need arise.
2. Visual inspection:
This phase entails examining the stent for any defects, such as burrs, cracks, tears or missing pieces.
Traditionally dimensional measurements of coronary stents have been carried out using a measuring microscope. However, our customers are switching to Swift PRO Duo in order to improve throughput without affecting quality.
Coronary stent inspection using Swift PRO Duo
Coronary stent dimensional inspection
This part of the inspection process requires measurement of the overall dimensions. In addition, the Swift PRO Duo is used to measure the:
• Strut
• Link
• Crown
• Wall Thickness
When it comes to coronary stents, measuring from edge to edge is not always simple. Edges are curved to avoid any sharp points that would cause trauma to an artery. For inspection teams using a video only system, this integral feature of stent design makes it difficult and time consuming to find a point of focus for a measurement point.
However, operators using Swift PRO Duo can look through the optical head, which offers a better depth of focus, improving the view of the stent edges. This allows them to select the correct edge points quickly and easily, ensuring correct, repeatable measurements of the struts and links. The ergonomic optical head also reduces reflections considerably and allows operators to inspect and measure at the same time.
Bare metal stents have a reflective nature which also has an impact on the accuracy of measurements. LED quadrant lighting is useful to create shadows where operators need to provide greater contrast on the highly reflective surface.
A side benefit of using LED lighting is that its long-life helps to minimise the cost of inspection.
Coronary stent visual inspection
Whilst conducting measurements, operators will also be visually inspecting the coronary stent for any structural faults or surface imperfections.
The use of quadrant lighting enhances the view of the stent, providing a good level of light in the areas of interest, yet reducing the impact of reflections. This optimal view of the surface ensures operators don’t mistake shadows for faults or miss defects hidden by glare, thereby reducing error rates.
Reporting and traceability
Detailed inspection reports are required as part of the quality control protocol. Swift Pro comes with versatile, easy to use M3 software, ensuring that reporting is seamlessly incorporated into the inspection process.
Operators will use the software to log each measurement against the individual stent serial number, whilst the camera can capture any relevant supporting images for inclusion in the final report. The report is saved using the unique serial number as an identifier. Should it be necessary, reports can be recalled using this number, for full traceability.
Outcomes
Customers have found that the use of Swift PRO Duo has improved accuracy and speed of inspection, reducing the burden of 100% inspection on the bottom line.
By following the rigorous inspection processes outlined above, manufacturers can reduce the risk of problems associated with stents whilst maintaining safety and quality.
SWIFT PRO PRODUCT CONFIGURATION:
The typical Swift PRO Duo configuration for this particular application consists of:
• Swift PRO mono optical head with a 5x or 10x metrology objective
• 200x100mm measruing stage
• Stand with 5MP camera
• 22” touchscreen monitor
• LED quadrant ring light
• Swift PRO lighting control and power supply unit
• M3 measurement and reporting software
ADDITIONAL BENEFITS OF SWIFT PRO DUO:
• Simple controls and intuitive M3 software lead to minimal operator training
• Small footprint makes it suitable for even the smallest clean rooms
• Durable design ensures product longevity
• Improved operator concentration and comfort due to ergonomic benefits of the optical head


