We all know that an excellent view of our samples is essential for fast, accurate inspection. Furthermore, capturing superior images is a fundamental requirement for reporting, traceability, or training documentation.
So how do you get the best possible view from your digital microscope?
Then, how do you achieve this every single time, regardless of operator and even when using your microscope for several applications? The key is understanding your digital microscope settings.
Digital Microscope Settings – An overview
The key to a good image is creating the correct digital microscope settings for a particular sample or component.
Settings to take into consideration are:
- Exposure
- Magnification
- White balance
- Noise reduction
Exposure settings
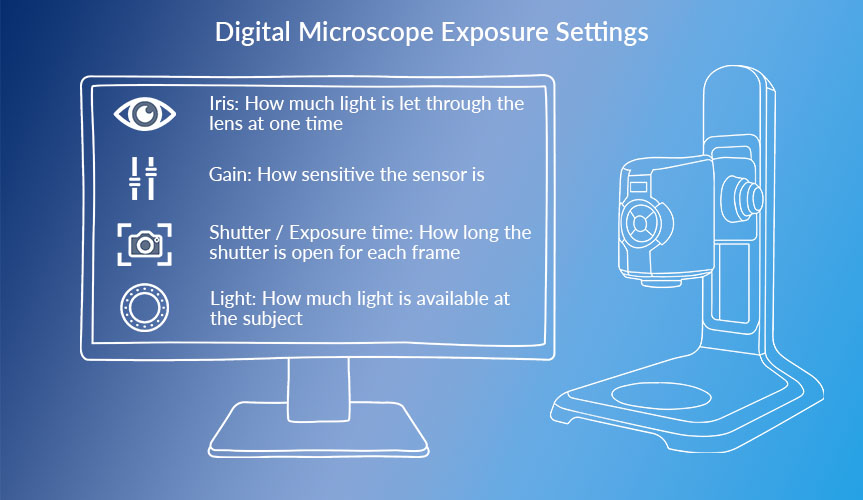
Exposure settings have a significant impact on image quality, and balancing each factor to complement each other will result in the best possible view.
Iris
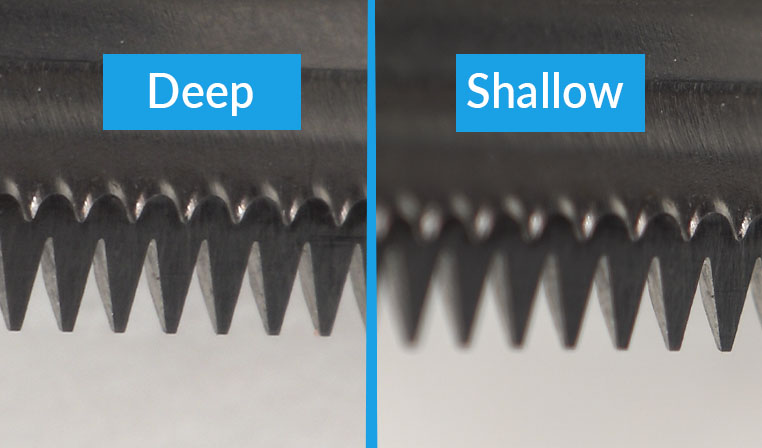
The iris controls how much light passes through the lens, which also impacts how much of the subject is in focus. Physics dictates that as magnification increases, the depth of focus reduces. For a flat subject, this is not a problem but for shaped and textured subjects this can be important.
To achieve the best view for your application requirements, refine the image quality by adjusting the size of the iris. An iris that is more open will have a smaller depth of focus (less of the subject will be in focus) but will typically give the sharpest results. An iris that is more closed will show more depth but will appear slightly less sharp.
Shutter / Exposure time
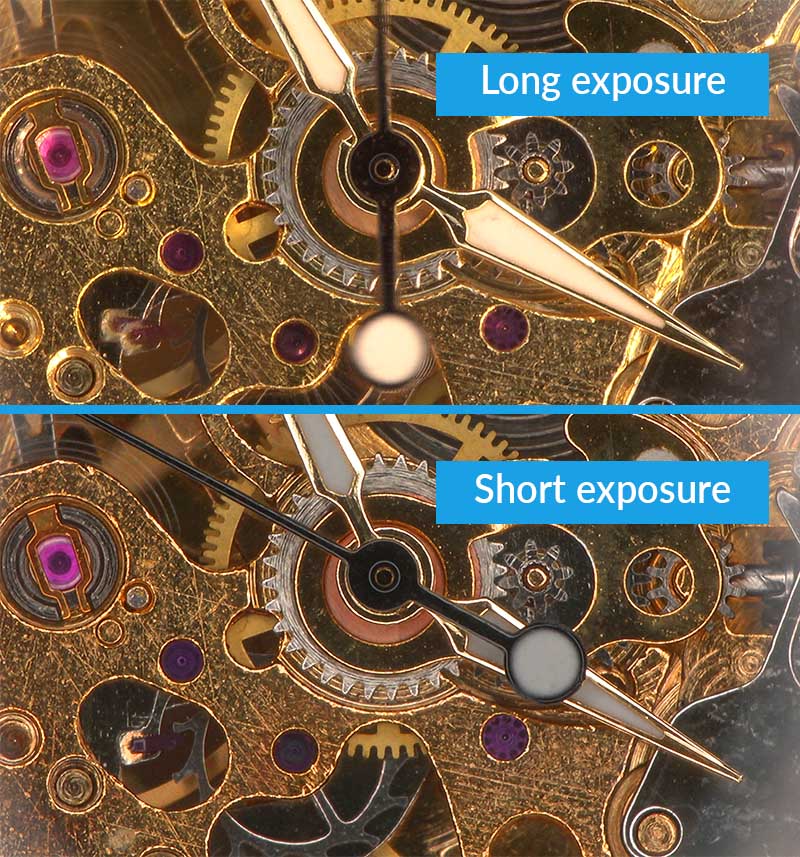
For samples where there is movement, such as biological samples or parts with mechanical movement, faster shutter times will capture the movement better. Whilst components with subtle details will benefit from longer shutter times that help to reduce image noise.
Gain
Increasing the gain will increase the sensitivity and allow images of darker subjects or in darker situations to be viewed, or for faster shutter speeds to be selected. As gain is increased the noise level in the image (speckling) will typically increase.
Light
Adding light to a subject can help balance the other settings. However, depending on the subject and other settings, too much light may have a detrimental effect on the image.
Creating a high quality image is dependent on balancing all the different exposures at the correct levels. Altering any one of the exposure settings can affect the optimal balance between exposures, decreasing the image quality.
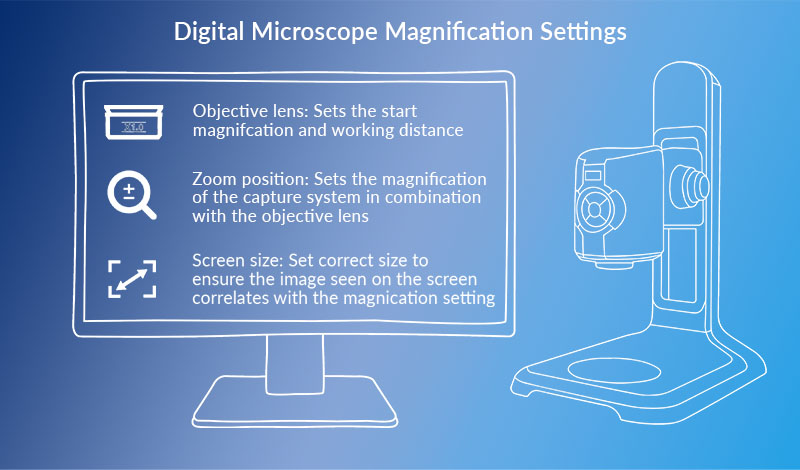
Image magnification
Objective lenses
The objective lens fitted to the microscope sets the start magnification and working distance for the subject. In combination with the zoom position it sets the combined capture magnification.
This also affects the perspective of the camera and depth of focus. The result is that images taken at the same capture magnification but with different objective lens/zoom position combinations will appear slightly different.
Zoom position
The zoom setting works in combination with the objective lens to set the capture magnification.
Screen size
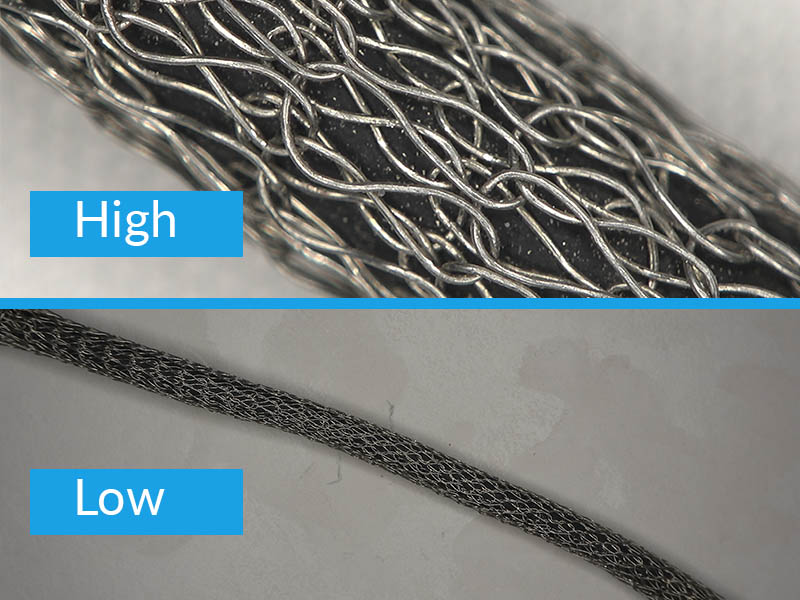
Setting the screen size completes the system to give a specific display magnification. An image displayed on a 12” screen will display ½ the magnification of the same image, with the same objective and zoom position combination, when displayed on a 24” screen.
Other digital microscope settings
White balance
White balance gives the correct colours for different lighting conditions.
Noise reduction
In situations where a high gain setting needs to be used, noise reduction helps to digitally remove any speckling from the image.
Experiment with these settings until you are satisfied that you have achieved the best possible view for this particular component or sample.
Create a Pre-set
Save the final setting as a customised pre-set for instant recall. Use the supervisor settings lock to ensure that another user does not inadvertently alter your master settings.
Share your digital microscope settings
Once you have created your pre-set you can share it across units and locations to set global inspection standards for a particular application. This will ensure a common inspection set-up for this particular application, making global compliance easier.
The result?
Inspection teams who are confident they can deliver, customers with confidence in your quality control procedures, and a well-deserved reputation for excellence and reliability.
Information based on functions available with EVO Cam II digital microscope.


